Ok...I promised a my friends a mini tut on pearl pens...it isn't perfect but my 7yr old daughter insisted on trying to help which also involved a little table knocking lol..bless her..
ok anyway 1st of all i used my Viva Decor textile pen to mark where i wanted my pearls..I have said i will get these in store asap lol there are 2 pens...one is for light material and the ther is for dark...as you can see this pen is red but the fabulous thing about it is...after a while it disappears as you will see in the next few pictures

Next, after turning your pen upside down and rolling it between your palms to send any air to the top, remove the lid and give the pen a gentle squeaze to form a small pearl on the end of the nozzle - not yet touching pen to material

Ok now squeaze a tad more to create the size pearl you want but be close to your material...as the pearl gets bigger yo want the bottom of the pearl to start touching the material...carry on until pearl is at preferred size...do NOT release pressure on the pen or you will just suck the pearl back in, just stop squeazing the tube, gently rotate the pen to smooth the top of the pearl and lift the pen away slowly...then release the pressure

As you move on to each pearl further along your flourish ease off your pressure to create smaller pearls....as you can see in this picture the textile pen is already starting to disappear :D Pretty cool huh lol

You can add decoration as you go or add it at the end..i prefer a little of both :D But if you add sprays off the original line make sure your pearl size is the same where you start it..or it looks odd :)
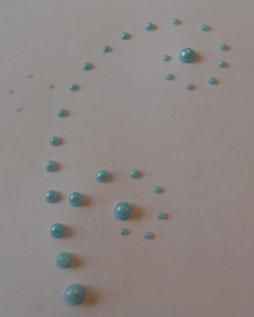

Ok now we've finished a basic flourish it's time for a little extra decoration....here i did a standard pearl then pulled the pen back and forth to create points a either end...you can also do this with a pin...just make your pearl..move the pen away then gently move the pearl around with the pin point to create your required shape. This one i did seperate to the flourish....

Then i started adding them to the flourish...cute little leaves...what do you think? :D

Sizes, amount, styles...endless choices of what to create with these marvelous pens...i for one am totally addicted lol
For more please see the 'heart tut' and 'line tut'
Hope you enjoyed:D
Hugs Lexi xxx


oh wow lexi, these are great. thanks for creating them for us 'pearl beginners'
ReplyDeletehugs rozzy xx
Hi Lexi,
ReplyDeleteThanks for the tutorial. I have some liquid pearls and haven't used them because everytime I tryed to make a round pearl didn't get it. I will try again.
Hugs,
Farida
Hey hunny, thanks for the fab tutorial, my pearls look nothing like pearls they are way too pointed so I'll be having a practice asap
ReplyDeletehugs Mandy xx