Tuesday 16 November 2010

Another Funky Christmas Tree Card :D


Hehe managed to get heat tool out today too! Seen as i had so much fun with this stamp i decided to make another with it lol
I entered it into the same challenges....

'totally gorjuss' - traditional christmas colours

'crazy 4 challenges' - christmas card or item

'creative insp' - anything christmassy/winter

'crafty pad' - christmas sparkle

'fairytale' - anything goes

'ABC' - h for holidays

Thanks for stopping by :D

hugs Lexi xxx

Blue Funky Tree Christmas Card


Finally making a move on some christmas cards lol....I had tons of fun making this...got my swirl stamp out and paper colour ink...pearl pens and 'funky christmas tree' stamp! The ink, pearl pens and stamp are available at 'Fairy Dust Crafts' and the stamp is also available as a digi :D
I have entered my card into the following challenges...

'totally gorjuss' - traditional christmas colours

'crazy 4 challenges' - christmas card or item

'creative insp' - anything christmassy/winter

'crafty pad' - christmas sparkle

'fairytale' - anything goes

'ABC' - h for holidays

'delightful sketches' - glitter it up

Thanks for checking out my card :D

hugs Lexi xxx

Monday 15 November 2010

Challenge #27 & DT call at Lexi's Creations


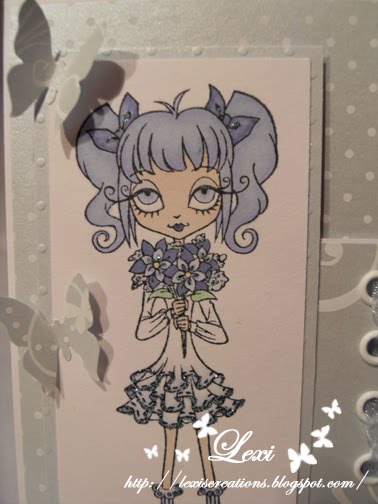
I used one of my new images for this one 'Merry Christmas' Santa Snowglobe for our challenge this week at 'Lexi's Creations'

The image is available at 'Fairy Dust Crafts' along with many more new images :D

I have to say even with everything that went wrong with this card! I had sooooo much fun making it

1st of all i used the letters & embellishments 'my paper world' rubber stamp and stamped it twice onto white card to create a backing paper which was when i noticed the ink was sticky when wet so i decided to coat it with glamour dust...i was so impressed with the turn out

Then, with being a tad giddy about being able to glitter the ink, i made another backing paper only this time i distressed a piece of card with light blue soft colour and sprinkled it with glamour dust aswell (yes i went a tad dust happy with this one but my carpet looks pretty now )

After i coloured my image with promarkers and added dust here n there and ice white pearl pen for the falling snow i wanted to stitch the image to the plain dusted paper yup...'i wanted to'...just the sewing machine didn't! Twice i stitched and unstitched until the edge was totally destroyed and i hd to cut it down and start over with the plain dusted powder then try stitching again (reminds me must get ian to look at machine) well it didnt work again and kept trying to rip up the card decided i wasnt removing the stitching again...pearl pens to the rescueeeee

did a surrounding frame over the stitching in light blue pearl pen and had bright idea to do Rozzy's idea of glittering the gel...went n tapped the excess off didnt i without letting it dry at all lol...gel everywhere! So i dabbed at it with my finger to give it an 'icing' look...nicely saved lol

Distress the edges of the plain dusted paper and stuck everything together..i made the flowers the same way as the plain paper and added ice white pearl pen to the centres and the bow? I found the most gorgeous ribbon when i was food shopping last weekend to only discover while i was making this card that it had wire in it lol which i was also super chuffed with as i love the look of a posed bow

I entered my card in the following challenges...

stamp challenges - use a digi

totally gorjuss - traditional christmas colours

crazy 4 challenges - christmas card or item

creative insp - anything christmassy/winter

crafty pad - christmas sparkle

fairytale - anything goes

ABC - h is for holidays

delightful sketches - glitter it up

thanks for checking out my card :D

hugs Lexi xxx

Thursday 4 November 2010

How to win some Prismacolour markers!


How do you fancy winning a set of 48 Prismacolor art markers, (worth £129), the ink is formulated to give the richest color saturation with silky smooooooth coverage. The duality of the thick and skinny tips let you change it up whenever the mood strikes. They are an alcohol, dye-based ink that’s non toxic and blendable, and they'll work in conjunction with your copics or promarkers, and come in a snazzy little carry case!

Easy...get yourselves over to 'Simply Create' to enter...just like I did :D
Good luck everyone xxx

Monday 18 October 2010

Birthdays! At Lexi's Creations..


Over at Lexi's Creations this week the challenge is 'Birthdays' as its our very 1st birthday :D And sponsoring us is 'Fairy Dust Crafts' with more than 1 chance to win...
•First Prize: 2 Fairy Dust Rubber Stamps to the winner (Lexi's Creation's images)….The stamps are called Fairy Dust stamps in the store
•2nd Prize: 3 Digi's

•3rd Prize: 2 Digi's From Fairy Dust Crafts

And here is my card :D I used 'Bear Dress up Dee' and 'How Do You' sentiment digi images (my own creations...available at Fairy Dust Crafts) did lots of tearing but but get this...i actually attempted distressing with inks for the veryyyy 1st time! Ok i went a tad over board but hey it was fun lol


I made the flower myself by cutting out 4 different sized circles...used tim holtz distress ink so it matched the card and used glamour dust around the edges..popped a brad throught the middle and..squeaaaazzeeeeeee! I even got my heat tool out :D not used that for months lol Oh and of course..Dee is coloured using Promarkers :D

I have entered my card into the following challenges...

'crafty calendar' - autumn birthdays

'papercutz' - anything goes

'creative corner' - embellishments

Thanks for stopping by and i hope you liked my card :D

hugs Lexi xxx

Saturday 16 October 2010

Line tutorial

This is the easiest way to learn your pen control...

First do your pre dots with a textile pen or pencil making sure the dots are nicely spaced with even gaps...


Form a pearl on the tip of the nozzle..move your pen close to your material then apply pressure to create a pearl...


as the pearl size grows you want the base of the pearl to start touching your material...once you have your desired size, do NOT release the pen, just stop applying pressure and gently rotate the nozzle on the pearl tip to form a round finish...then slowly lift away your pen...

Then move along the line using less pressure on your pen with each pearl

Well thats it for today lol Hope you found these tut's helpful and have tons of fun learning to use your pearl pens :D

If you don't have the pleasure of owning these gorgeous pens yet..nip over to 'Fairy Dust Crafts' to have a look at the fab colour selection available :D

Hugs Lexi xxx

Heart tutorial...

Nice easy one :D (she says lol)
Ok start with making yourself 2 dots....this is to mark where the top curves of the heart will start


I started with the left side as i find it easier but this is your choice...make a pearl at the tip of the nozzle then apply like explained in the flourish tut...slowly drag the pearl down to a point while also very slowly releasing the pressure on your pen..


Then, same as with the first part, pearl on 2nd dot dragging down to meet the point you made with the 1st pearl...


One heart :D


Hope you enjoyed this and find it easy to make cute little things with your pearl pens :D

For more please see 'flourish tut' and line tut'

Hugs Lexi xxx

Pearl Pen fans :D

Ok...I promised a my friends a mini tut on pearl pens...it isn't perfect but my 7yr old daughter insisted on trying to help which also involved a little table knocking lol..bless her..

ok anyway 1st of all i used my Viva Decor textile pen to mark where i wanted my pearls..I have said i will get these in store asap lol there are 2 pens...one is for light material and the ther is for dark...as you can see this pen is red but the fabulous thing about it is...after a while it disappears as you will see in the next few pictures


Next, after turning your pen upside down and rolling it between your palms to send any air to the top, remove the lid and give the pen a gentle squeaze to form a small pearl on the end of the nozzle - not yet touching pen to material


Ok now squeaze a tad more to create the size pearl you want but be close to your material...as the pearl gets bigger yo want the bottom of the pearl to start touching the material...carry on until pearl is at preferred size...do NOT release pressure on the pen or you will just suck the pearl back in, just stop squeazing the tube, gently rotate the pen to smooth the top of the pearl and lift the pen away slowly...then release the pressure


As you move on to each pearl further along your flourish ease off your pressure to create smaller pearls....as you can see in this picture the textile pen is already starting to disappear :D Pretty cool huh lol


You can add decoration as you go or add it at the end..i prefer a little of both :D But if you add sprays off the original line make sure your pearl size is the same where you start it..or it looks odd :)


Ok now we've finished a basic flourish it's time for a little extra decoration....here i did a standard pearl then pulled the pen back and forth to create points a either end...you can also do this with a pin...just make your pearl..move the pen away then gently move the pearl around with the pin point to create your required shape. This one i did seperate to the flourish....


Then i started adding them to the flourish...cute little leaves...what do you think? :D


Sizes, amount, styles...endless choices of what to create with these marvelous pens...i for one am totally addicted lol

For more please see the 'heart tut' and 'line tut'

Hope you enjoyed:D

Hugs Lexi xxx

Monday 4 October 2010

Lexi's Creations - spooky challenge :D

This weeks challenge is....SPOOKYYYYY (oooeeeooooo)...I couldnt decide which image to use and the kids were no help as they all picked different images! lol so i settled with making 2..sat to craft then realised :O i had no halloween bits lol so out came the robo and anything black green or orange that i could find...then i hoped over to 'stitchy bear stamps' and grabbed a halloween paper pack off 'Robyns Fetish' so heres what i managed to whip up :D...


This is one of my new images 'Pumpin Bear' using Eleganza ribbon, an e-line prima flower and 3 tier pins 'all available at Fairy Dust Crafts' and then spotted a fluffy ribbon in my stash...added a blob of black pearl pen to the centre of the flower and bobs yer uncle lol..not too bad for a no halloween stash gal:D (pearl pens will be in store this week :D)


This is another new image of mine 'Witch Bear'...i had mucho fun with this one...for a simple looking card! It was fiddly lol coz after a whole day all i had was a printed paper and 2 spiders lol...yup...i had to wait for them to dry lol i made them with black pearl pens and paper covered wire off my flowers and coloured them black with promarker :D As you can see below lol...


I have entered both cards into the following challenges

'incy wincy' - anything goes (both)

'character cafe' - recipe - pumpkin bear

'SSDS' - anything goes - pumpkin bear

'paper sundaes' - something from stash (black fluffy ribbon) - witch bear

'sentimental sundays' - Autumn or fall - pumpkin bear

'bee crafty' - furry/fluffy friends - both

'crazy 4 challenges' - colour combo - pumpkin bear

Thanks for stopping by

Hugs lexi xxx

Monday 6 September 2010

Lexi's Creations #22 Flower power

Us lucky girls got the chance to use some beautiful hand made flowers and lace ribbons from Craftbrulee...it's a must to pop along and have a look at the gorgeous items available
this week we are sponsored by Joanna sheen who is offering a £10 gift voucher to the winner:D


Here is the card i made using one of my latest sentiments 'Precious Friend' available at 'Fairy Dust Crafts'


I must admit my mojo went walkies this last few weeks but with hubby away and sorting kids for new school, stocking up the store and moving into new house i'd not be surprised if it had taken flying leap off a cliff lol

I have entered my card into the following challenges...


'CES challenges' - floral frenzy

'fab n funky' - material world (lace)

'simon says' - pearls n lace

'crafty den' - say it with flowers

Thanks for stopping by :D

hugs Lexi xxx

Sunday 29 August 2010

OSAAT #28 Girly or Photo inspiration

This week the challenge over at 'One Stitch at a Time' is Girly OR Photo inspiration! I chose the Girly theme but the photo inspiration are these yummy bubbles :D....


The sponsor this week is Kenny K and the prizes are...

First prize is 3 digi's
Second prize is 2 digi's
Third prize is 1 digi
I got to use Lady Raven and I gotta say i had mucho fun :D


I have entered my card into the followng challenges :D...

'Wild Orchid' - Make it sparkle

'artful inkables' - Bling it on baby

'creative card crew' - sparkle & shine

'CRAFT' - anything goes

'rainbow' - sparkle & shine

'stampin 4 the weekend' - anything goes

'bee crafty' - anything goes

thanks for stopping by :D

hugs Lexi xxx

Monday 9 August 2010

Lexi's Creations challenge #20 orange 'n' yellow


This is my DT card for 'Lexi's Creations' using 'DIY Butterfly' available at 'Fairy Dust Crafts'
This fortnight our challenge is Orange and Yellow ...perfect summer colours :D My card is a tad thrown together as most of my craft stuff is now packed away for the move tomorrow lol but i have entered it in the following challenges...

'creative friday' - things with wings

'pennys' - anything goes

'cute card thursday' - whateva

'playdate cafe' - colour combo

'dutch dare' - anything goes

'craft your days away' - fave things (butterflies)

thanks for stopping by and please come join us at 'Lexi's Creations'

hugs Lexi xxx

my card for LHDC kids challenge #9


I decided to help the kids out with their DT cards this month over at 'Little hands do crafts' and used 'ice princess' by stitchy stamps from 'stitchy bear stamps' I have entered it into these challenges...

'dutch dare' - anything goes

'ooh la la' - spots n dots (i added gel pearls for dots)

'meljen' - clean and simple (this is the closest to a CAS card i'm ever gonna get lol)

thanks for stopping by...

hugs Lexi xxx

Wednesday 4 August 2010

lil lolita xmas


I made this for the xmas in july challenge on 'lil lolita'


Hope you like it..its a bit basic but most my craft stuf is now packed

hugs lexi xxx

Tuesday 27 July 2010

Lil Lolita challenge card...


You gotta just love these girls! I'm addicted thats for sure:D This card i've been making for a couple of days now....my sewing machine decided it didn't want to play when i got half way through stitching around the image :O so after many hours of fiddling (and a few curse words) i finally got it to play ball and got it finished...you have to come along to play at 'Lil Lolita's' this week they have a colour challenge pink, purple and cream and the fab 'Sookie' for a prize! here she is....


isn't she awesome!

Thanks for stopping by :D

hugs Lexi xxx

Monday 26 July 2010

Challenge #19 LC...Paper Piecing


Here is my card using my image 'Georgina Giraffe' for our challenge over at 'Lexi's Creations' ....how much fun is paper piecing! I made this card with my nephew in mind :D
All of my images are now available at fairy dust crafts...

I tied this card in with a few other challenges...here they are.....

'paper romance' - choc, teal and white

'create 4 fun' - flowers

'dare u2' - stitching

'SSDS' - use a digi

'mami' - anything goes

'creative inspirations' - anything goes

'crafty creations' - happy or sweet

'papertake' - cutie patootie

'creative cottage' - touchy feely
thanks for stopping by :D
hugs Lexi xxx

Sunday 25 July 2010

'Christmas Shopping Phoebe'


My latest image 'Christmas Shopping Phoebe' is now available at my new store 'Fairy Dust Crafts' I thorougly enjoyed creating her so I hope you love her as much as I do...
...thanks for checking her out :D
Hugs Lexi xxx

Tuesday 13 July 2010

lil lolita challenge #5 - ribbons


Oh boy did i have fun making this :D did take ages to thread the ribbon though lol I ripped a few bits off a huge feather i have sat on my desk and put it behind the flowers then decided you culdnt see it very well in main pic so i did a close up lol I adore lil lolita stamps :D you can find the challenge i entered.... 'Lil Lolita'
thanks for looking
hugs lexi xxx